Meta guide
NB: this guide is a draft and should not be linked to any page
Biggest priority - not to die.
Second biggest - contribute to town as much as possible, never play selfish.
Third - communication is the key, use Forums and IRC.
Town planing[edit]
- Know your members:
Collect vital data about your players spreadsheets that list name profession and online time are minimum a rationing plan is helpful as well If you are no full 40 members accept the consequences and expect the worst random fillers you can imagine and hope for the best.
- Agree on means of Communication all sorts of communication have their up and downsides. You can try to rely solely on the town forum or add a way of communication or more (IRC,Facebook-groups,webpageoverlaychats,skype, exchange everyones phone numbers) all have their up and downsides. Limiting the number of communication canals is imperativ as well.
- Agree on what are you trying to achieve with this meta in general and the next town in particular. Most may go for ranking but there are other ways to have fun in the game
Early game[edit]
Scavenging[edit]
- If you have means to plan, oversee and manage your expeditions to minimize risk and overlapping use them!
- Take Food, Water go 9AP from town then AS on your way back to town starting with 9AP zone
- Always bring back Heavy object, except when there is no USE from it
- Judge resources by their AP value
- a) town has Workshop built - plank 3AP - beam 6AP - food 6AP (in this case beam should be brought)
- b) town has Workshop, Factory, Hacksaw - plank 1AP - beam 2AP - food 6AP
- Don't drag items away from town! If you're no tamer or planning on using Heroic return at the end of your trip then don't take any items away from town that are needed in town. Only exception is for very rare items that you wouldnt swap for any other object you could possibly find on your tour and can't be taken home by someone else (blueprints/hacksaw)
Item priorities[edit]
- Always take heavy object
- Do not take chests to town, try to leave them in 6AP zone
- Do not take more than needed
- 6 Engines for example
- 2 Coffee making machines
- Flat-packed furniture over DO, when there is no need for Jarpen table
Heavy objects[edit]
- Flat-packed furniture
- Lawnmower
- Engine
- Coffee making machine
- Defensive items
- Animals
Objects[edit]
- Hacksaw ( one is enough )
- Guard dog
- Nuts&Bolts, Blueprints
- Camping items
- Drugs, Alcohol
- Fat cat
- Copper pipe, Electronic component
- Mechanism, Broken Electronic Device
- Closed cans, all kinds of nonheavy food containers
- Chains
- Iron, Planks
- Other stuff
- Scrap, Logs
Zombie control[edit]
- IF bank has spare weapons, use them, do not plan trips around zombies at early stage
- IF town has enough Survivalists, use their Water in water based weapons ( day 1-2 )
- Tamers always should have priority on Manbags and Weapons
Zombie spread & spawn[edit]
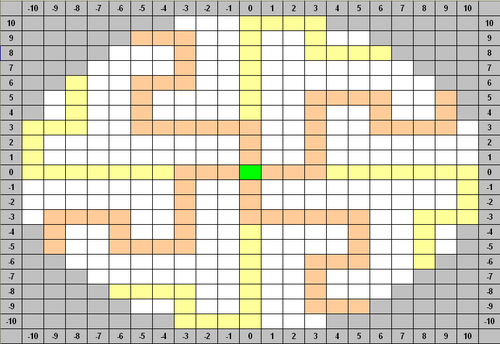
- Zombies spawn on buildings and chests in the start of the game, then spread from there
- For every 2 zombies killed at zone 1 will die from grief.
- Zombies spread, then spawn or die from grief
Camping[edit]
- Plan before on camping next nearby building
- Plan on getting Learned Camper
- Camp only at optimal chances
- Plan on getting Tamer, for BP, maybe clearing
Upgrades[edit]

NB: under heavy discussion WT3 vs. 8 BiA'ed scouts
- WT1
- WT2
- WT3
- First three levels of WT same as "8 BiA'ed scouts" are crucial to see how zombies are spreading
- ...
Mid game[edit]
- make sure everyone spends 2(1 with WT4/4) AP ASing for rotten logs and scrap metal
